Exploring the Precision and Versatility of AtomStack Pro Series Laser Engravers
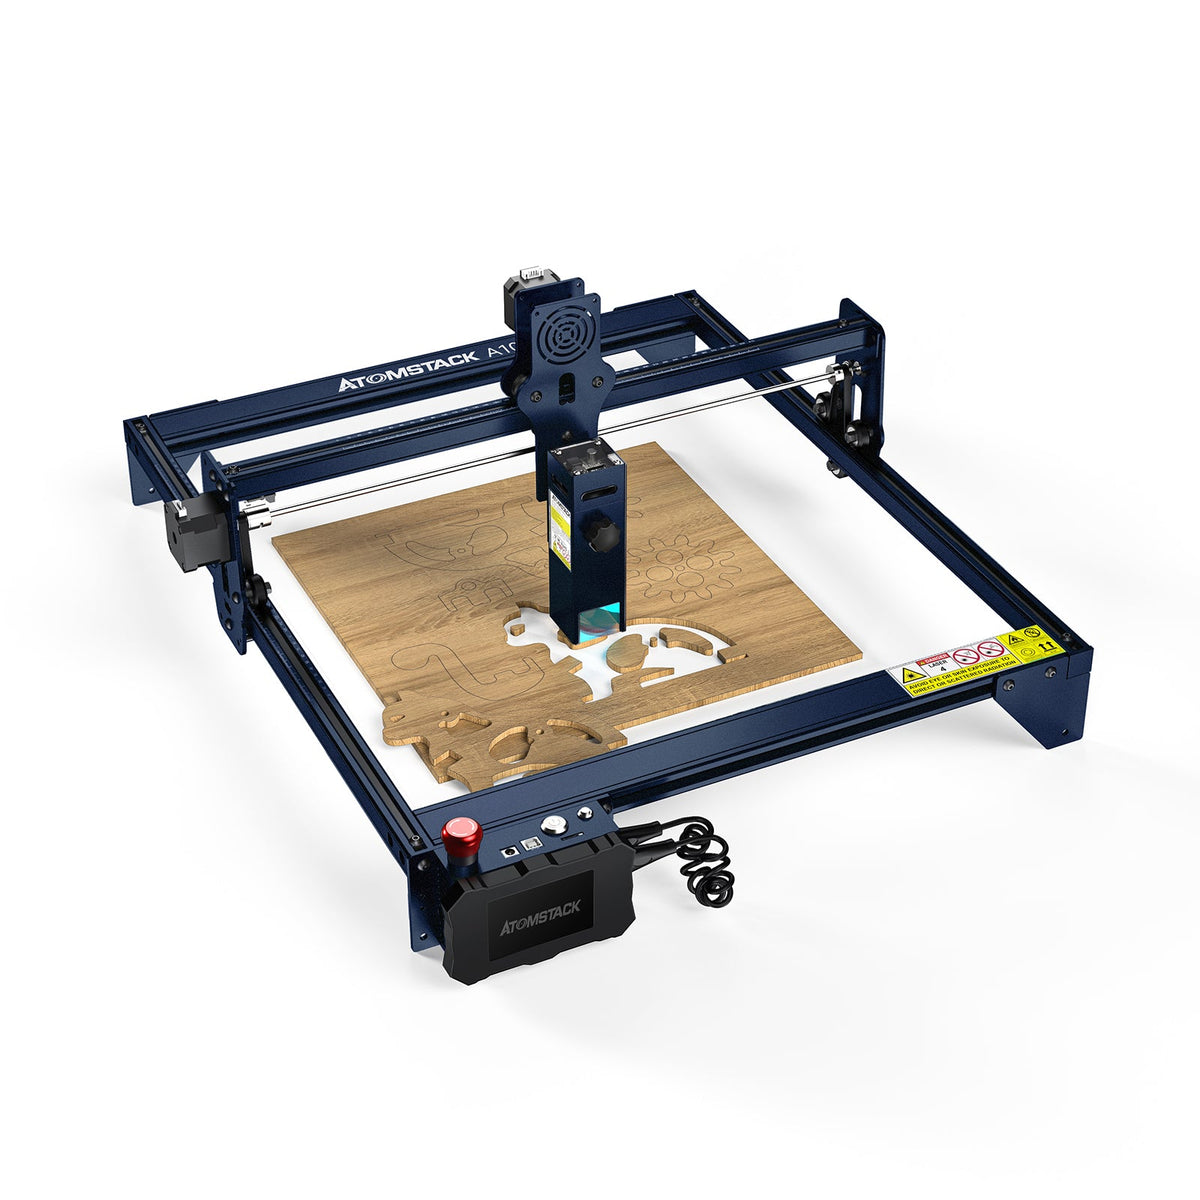
AtomStack Pro Series laser engravers sit in an interesting place between hobby machines and more serious workshop tools. They are approachable enough for signs, gifts, leather patches, model parts, packaging prototypes, and small batches, but the better models also have enough power and accessory support to reward careful setup.
The part that matters most is not only wattage. A laser engraver becomes useful when the frame stays square, the work surface is repeatable, the air flow is controlled, the material is tested, and the operator stops guessing. That is where AtomStack machines can be appealing: the ecosystem gives you multiple paths, from a compact diode engraver to stronger Pro models, fiber marking options, rotary tools, cameras, honeycomb beds, enclosures, and air management.
What The Pro Series Is Best At
The strongest use case for an AtomStack Pro-style machine is controlled customization. Think engraved cutting boards, wood signs, leather tags, anodized aluminum marking, acrylic tests, packaging mockups, small batch ornaments, and personalized shop products. These machines are especially useful when the same design needs to be repeated with small changes: a name, logo, serial number, date, or size variation.
For a home workshop, the appeal is flexibility. A single machine can handle engraving one day and light cutting the next, as long as the material is appropriate for the laser type and power. For a small business, the value comes from repeatability. Once a material setting is dialed in, the machine can turn a design file into a repeatable product without sending every job to an outside vendor.
Power Is Useful, But Control Is What Makes It Look Professional
Higher output can cut thicker material faster, but it does not automatically create cleaner work. Burn marks, smoke staining, edge charring, fuzzy engraved text, and uneven cuts usually come from a mix of speed, power, focus height, air assist, material quality, and bed support. The best results often come from a moderate setting that is repeatable rather than an aggressive setting that barely works.
For wood, the grain and glue layers matter. Plywood can vary dramatically from sheet to sheet, and a laser that cuts one panel cleanly may struggle with another panel from the same listing. For leather, chrome tanning is a safety concern and vegetable-tanned leather is usually the better starting point. For acrylic, color and laser type matter. For metal, a diode laser may mark coated or treated surfaces, while a fiber or infrared module is often the more appropriate tool for direct marking.

Choosing Between Diode, High-Power Diode, And Fiber Marking
A diode engraver is the usual starting point because it is relatively accessible and works well on many common craft materials. A stronger diode machine helps when cutting speed and thickness matter, but it still has material limits. It is not a magic replacement for a CO2 laser or a fiber marking system.
Fiber and infrared marking machines are a different category. They are attractive when the goal is metal marking, tool tags, nameplates, industrial labels, jewelry-style marks, or fine detail on materials that do not respond well to a standard blue diode laser. The tradeoff is that they are more specialized. A fiber marking machine may be excellent for metal and plastic marking but not the best choice for cutting wood sheets.
| Laser direction | Best for | Watch closely |
|---|---|---|
| Compact diode engraver | Wood engraving, leather tests, painted surfaces, paper, cardboard, simple signs | Slower cutting, smoke control, and careful focus setup |
| High-power diode cutter | More serious wood cutting, batch craft products, thicker sheet tests, faster workflow | Ventilation, air assist, bed support, and fire safety become more important |
| Fiber or infrared marking | Metal tags, plastics, fine marking, industrial-style identification, small parts | Less general-purpose for craft cutting; choose it for marking jobs, not as an all-in-one machine |

Why Air Assist And A Honeycomb Bed Change The Result
Air assist is one of the first upgrades that makes a visible difference. It pushes smoke away from the cut line, reduces flare-ups, and helps keep the lens cleaner. On wood, that can mean less dark staining around the cut. On thicker material, it can help the beam reach the cut path more consistently instead of fighting smoke and residue.
A honeycomb bed solves a different problem. It gives the material support while leaving space below the cut, so smoke and heat are not trapped directly under the workpiece. It also reduces back-side scorching compared with placing material flat on a solid board. For thin plywood, ornaments, templates, and repeated small shapes, a honeycomb surface can make the whole workflow cleaner and less fussy.
What Precision Really Means In Daily Use
Precision is not just the advertised spot size. In real use, it is whether the machine returns to the same point, whether a rectangle is truly square, whether a circle looks round, and whether small text stays readable after several passes. Mechanical setup matters: belt tension, frame alignment, wheel condition, table stability, and focus height all show up in the final engraving.
A good test is to engrave a grid, a set of small text labels, and a few circles on scrap material. If the text is sharp in one corner and soft in another, the bed may not be level or the material may be warped. If circles look slightly oval, check belts and frame squareness. If cuts fail at the same area of the bed, inspect focus height and surface flatness before blaming the laser module.
Rotary Engraving Opens A Different Kind Of Project
Flat engraving is only part of the story. A rotary attachment lets the machine engrave cylindrical or curved objects such as tumblers, bottles, mugs, handles, and round containers. This is where setup becomes more mechanical: the item must sit straight, rotate smoothly, and keep the engraving surface at a consistent focus distance.
Rotary work is powerful for personalized gifts and small shop products, but it also punishes rushing. A tumbler that slips slightly can ruin a logo. A tapered object needs better support than a straight cylinder. Before engraving a finished item, wrap a test object or use a low-value blank to confirm scaling, rotation direction, and alignment.

Safety And Workspace Setup Should Come Before Speed
Laser engraving creates light, heat, smoke, and fumes. That means eye protection, ventilation, fire awareness, and material choice are not optional details. A powerful open-frame laser should not be treated like a desktop printer. Even a quick engraving can produce smoke, and cutting jobs can ignite scraps if the material lifts, the focus is wrong, or air flow is poor.
An enclosure can help contain smoke and shield the work area, but it still needs proper exhaust planning. The goal is not to trap fumes in a box; the goal is to move them away from the operator and out of the room safely. A clean bed also matters. Small offcuts, paper scraps, tape, and resin-heavy debris can flare when the laser passes over them.

How The A70-Class Machines Fit Into The Lineup
The A70-class machines make sense when cutting power and productivity matter more than simply learning the basics. They are better suited for users who already understand material testing, focus, workholding, exhaust, and project repeatability. The extra capability is useful, but it also makes setup quality more important because mistakes happen faster at higher power.
If the goal is occasional engraving on small wood gifts, a top-power cutter may be more machine than necessary. If the goal is thicker sheet work, more serious batches, or a workshop that needs shorter production time, the larger model becomes easier to justify. The decision should come from actual project size, material thickness, and how often the machine will run.

Beginner Mistakes That Make Good Machines Look Bad
The first mistake is skipping test grids. A laser setting found online is only a starting point because material density, surface coating, moisture, color, and thickness all change the result. The second mistake is ignoring focus. A slightly wrong focus can turn crisp detail into soft burn marks. The third mistake is trying to cut too slowly at high power, which can char the edge instead of improving the cut.
Another common problem is over-trusting preview placement. Cameras and software previews are useful, but physical alignment marks and low-power framing are still worth using on expensive blanks. For repeat work, jigs are the quiet hero. A simple corner jig for coasters, tags, or small boards can save more time than any setting tweak.
| Project type | Useful setup | Practical tip |
|---|---|---|
| Wood signs | Diode engraver, air assist, honeycomb bed, scrap test strips | Test the exact stain or finish because coatings can change engraving color |
| Leather patches | Ventilation, low-to-moderate power tests, flat hold-down method | Use suitable leather and avoid unknown treated materials |
| Metal marking | Fiber or infrared direction, stable positioning, fine focus control | Match the laser type to the metal surface instead of relying on wattage alone |
| Tumblers and bottles | Rotary attachment, test cylinder, focus check across the curve | Confirm rotation direction and scaling before using a finished blank |
Bottom Line
AtomStack Pro Series laser engravers are most interesting when they are treated as workshop systems rather than single gadgets. The laser module matters, but so do air assist, bed support, enclosure planning, material testing, software setup, and repeatable workholding. A careful user with a modest machine can often produce cleaner results than an impatient user with a stronger one.
For current AtomStack product cards, tracked prices, and available partner offers, check the AtomStack coupons and deals page while comparing machines and accessories. It is useful when deciding whether to start with an engraver first or budget for the bed, enclosure, rotary, and air control pieces at the same time.
AtomStack Deal Check
Compare AtomStack engravers, accessories, tracked prices, and current offer hints before choosing a workshop setup.
View AtomStack OffersFAQ
Is a higher-watt AtomStack laser always better?
Not always. Higher power helps with cutting and speed, but detail, material choice, focus, air assist, and workholding often matter more for clean engraving.
Do I need a honeycomb bed for laser engraving?
For light engraving, not always. For cutting, repeat work, and cleaner back sides, a honeycomb bed is one of the most useful upgrades.
Can AtomStack diode lasers engrave metal?
They can mark some coated, painted, or treated metal surfaces, but direct metal marking is usually better handled by the right fiber or infrared laser setup.
What should I test before engraving a finished product?
Test speed, power, focus, air assist, line spacing, and placement on scrap from the same material. For curved items, test rotary alignment and scaling first.
AtomStack Pro Series laser engravers sit in an interesting place between hobby machines and more serious workshop tools. They are approachable enough for signs, gifts, leather patches, model parts, packaging prototypes, and small batches, but the better models also have enough power and accessory support to reward careful setup.
The part that matters most is not only wattage. A laser engraver becomes useful when the frame stays square, the work surface is repeatable, the air flow is controlled, the material is tested, and the operator stops guessing. That is where AtomStack machines can be appealing: the ecosystem gives you multiple paths, from a compact diode engraver to stronger Pro models, fiber marking options, rotary tools, cameras, honeycomb beds, enclosures, and air management.
What The Pro Series Is Best At
The strongest use case for an AtomStack Pro-style machine is controlled customization. Think engraved cutting boards, wood signs, leather tags, anodized aluminum marking, acrylic tests, packaging mockups, small batch ornaments, and personalized shop products. These machines are especially useful when the same design needs to be repeated with small changes: a name, logo, serial number, date, or size variation.
For a home workshop, the appeal is flexibility. A single machine can handle engraving one day and light cutting the next, as long as the material is appropriate for the laser type and power. For a small business, the value comes from repeatability. Once a material setting is dialed in, the machine can turn a design file into a repeatable product without sending every job to an outside vendor.
Power Is Useful, But Control Is What Makes It Look Professional
Higher output can cut thicker material faster, but it does not automatically create cleaner work. Burn marks, smoke staining, edge charring, fuzzy engraved text, and uneven cuts usually come from a mix of speed, power, focus height, air assist, material quality, and bed support. The best results often come from a moderate setting that is repeatable rather than an aggressive setting that barely works.
For wood, the grain and glue layers matter. Plywood can vary dramatically from sheet to sheet, and a laser that cuts one panel cleanly may struggle with another panel from the same listing. For leather, chrome tanning is a safety concern and vegetable-tanned leather is usually the better starting point. For acrylic, color and laser type matter. For metal, a diode laser may mark coated or treated surfaces, while a fiber or infrared module is often the more appropriate tool for direct marking.
Choosing Between Diode, High-Power Diode, And Fiber Marking
A diode engraver is the usual starting point because it is relatively accessible and works well on many common craft materials. A stronger diode machine helps when cutting speed and thickness matter, but it still has material limits. It is not a magic replacement for a CO2 laser or a fiber marking system.
Fiber and infrared marking machines are a different category. They are attractive when the goal is metal marking, tool tags, nameplates, industrial labels, jewelry-style marks, or fine detail on materials that do not respond well to a standard blue diode laser. The tradeoff is that they are more specialized. A fiber marking machine may be excellent for metal and plastic marking but not the best choice for cutting wood sheets.
| Laser direction | Best for | Watch closely |
|---|---|---|
| Compact diode engraver | Wood engraving, leather tests, painted surfaces, paper, cardboard, simple signs | Slower cutting, smoke control, and careful focus setup |
| High-power diode cutter | More serious wood cutting, batch craft products, thicker sheet tests, faster workflow | Ventilation, air assist, bed support, and fire safety become more important |
| Fiber or infrared marking | Metal tags, plastics, fine marking, industrial-style identification, small parts | Less general-purpose for craft cutting; choose it for marking jobs, not as an all-in-one machine |
Why Air Assist And A Honeycomb Bed Change The Result
Air assist is one of the first upgrades that makes a visible difference. It pushes smoke away from the cut line, reduces flare-ups, and helps keep the lens cleaner. On wood, that can mean less dark staining around the cut. On thicker material, it can help the beam reach the cut path more consistently instead of fighting smoke and residue.
A honeycomb bed solves a different problem. It gives the material support while leaving space below the cut, so smoke and heat are not trapped directly under the workpiece. It also reduces back-side scorching compared with placing material flat on a solid board. For thin plywood, ornaments, templates, and repeated small shapes, a honeycomb surface can make the whole workflow cleaner and less fussy.
What Precision Really Means In Daily Use
Precision is not just the advertised spot size. In real use, it is whether the machine returns to the same point, whether a rectangle is truly square, whether a circle looks round, and whether small text stays readable after several passes. Mechanical setup matters: belt tension, frame alignment, wheel condition, table stability, and focus height all show up in the final engraving.
A good test is to engrave a grid, a set of small text labels, and a few circles on scrap material. If the text is sharp in one corner and soft in another, the bed may not be level or the material may be warped. If circles look slightly oval, check belts and frame squareness. If cuts fail at the same area of the bed, inspect focus height and surface flatness before blaming the laser module.
Rotary Engraving Opens A Different Kind Of Project
Flat engraving is only part of the story. A rotary attachment lets the machine engrave cylindrical or curved objects such as tumblers, bottles, mugs, handles, and round containers. This is where setup becomes more mechanical: the item must sit straight, rotate smoothly, and keep the engraving surface at a consistent focus distance.
Rotary work is powerful for personalized gifts and small shop products, but it also punishes rushing. A tumbler that slips slightly can ruin a logo. A tapered object needs better support than a straight cylinder. Before engraving a finished item, wrap a test object or use a low-value blank to confirm scaling, rotation direction, and alignment.
Safety And Workspace Setup Should Come Before Speed
Laser engraving creates light, heat, smoke, and fumes. That means eye protection, ventilation, fire awareness, and material choice are not optional details. A powerful open-frame laser should not be treated like a desktop printer. Even a quick engraving can produce smoke, and cutting jobs can ignite scraps if the material lifts, the focus is wrong, or air flow is poor.
An enclosure can help contain smoke and shield the work area, but it still needs proper exhaust planning. The goal is not to trap fumes in a box; the goal is to move them away from the operator and out of the room safely. A clean bed also matters. Small offcuts, paper scraps, tape, and resin-heavy debris can flare when the laser passes over them.
How The A70-Class Machines Fit Into The Lineup
The A70-class machines make sense when cutting power and productivity matter more than simply learning the basics. They are better suited for users who already understand material testing, focus, workholding, exhaust, and project repeatability. The extra capability is useful, but it also makes setup quality more important because mistakes happen faster at higher power.
If the goal is occasional engraving on small wood gifts, a top-power cutter may be more machine than necessary. If the goal is thicker sheet work, more serious batches, or a workshop that needs shorter production time, the larger model becomes easier to justify. The decision should come from actual project size, material thickness, and how often the machine will run.
Beginner Mistakes That Make Good Machines Look Bad
The first mistake is skipping test grids. A laser setting found online is only a starting point because material density, surface coating, moisture, color, and thickness all change the result. The second mistake is ignoring focus. A slightly wrong focus can turn crisp detail into soft burn marks. The third mistake is trying to cut too slowly at high power, which can char the edge instead of improving the cut.
Another common problem is over-trusting preview placement. Cameras and software previews are useful, but physical alignment marks and low-power framing are still worth using on expensive blanks. For repeat work, jigs are the quiet hero. A simple corner jig for coasters, tags, or small boards can save more time than any setting tweak.
| Project type | Useful setup | Practical tip |
|---|---|---|
| Wood signs | Diode engraver, air assist, honeycomb bed, scrap test strips | Test the exact stain or finish because coatings can change engraving color |
| Leather patches | Ventilation, low-to-moderate power tests, flat hold-down method | Use suitable leather and avoid unknown treated materials |
| Metal marking | Fiber or infrared direction, stable positioning, fine focus control | Match the laser type to the metal surface instead of relying on wattage alone |
| Tumblers and bottles | Rotary attachment, test cylinder, focus check across the curve | Confirm rotation direction and scaling before using a finished blank |
Bottom Line
AtomStack Pro Series laser engravers are most interesting when they are treated as workshop systems rather than single gadgets. The laser module matters, but so do air assist, bed support, enclosure planning, material testing, software setup, and repeatable workholding. A careful user with a modest machine can often produce cleaner results than an impatient user with a stronger one.
For current AtomStack product cards, tracked prices, and available partner offers, check the AtomStack coupons and deals page while comparing machines and accessories. It is useful when deciding whether to start with an engraver first or budget for the bed, enclosure, rotary, and air control pieces at the same time.
AtomStack Deal Check
Compare AtomStack engravers, accessories, tracked prices, and current offer hints before choosing a workshop setup.
View AtomStack OffersFAQ
Is a higher-watt AtomStack laser always better?
Not always. Higher power helps with cutting and speed, but detail, material choice, focus, air assist, and workholding often matter more for clean engraving.
Do I need a honeycomb bed for laser engraving?
For light engraving, not always. For cutting, repeat work, and cleaner back sides, a honeycomb bed is one of the most useful upgrades.
Can AtomStack diode lasers engrave metal?
They can mark some coated, painted, or treated metal surfaces, but direct metal marking is usually better handled by the right fiber or infrared laser setup.
What should I test before engraving a finished product?
Test speed, power, focus, air assist, line spacing, and placement on scrap from the same material. For curved items, test rotary alignment and scaling first.