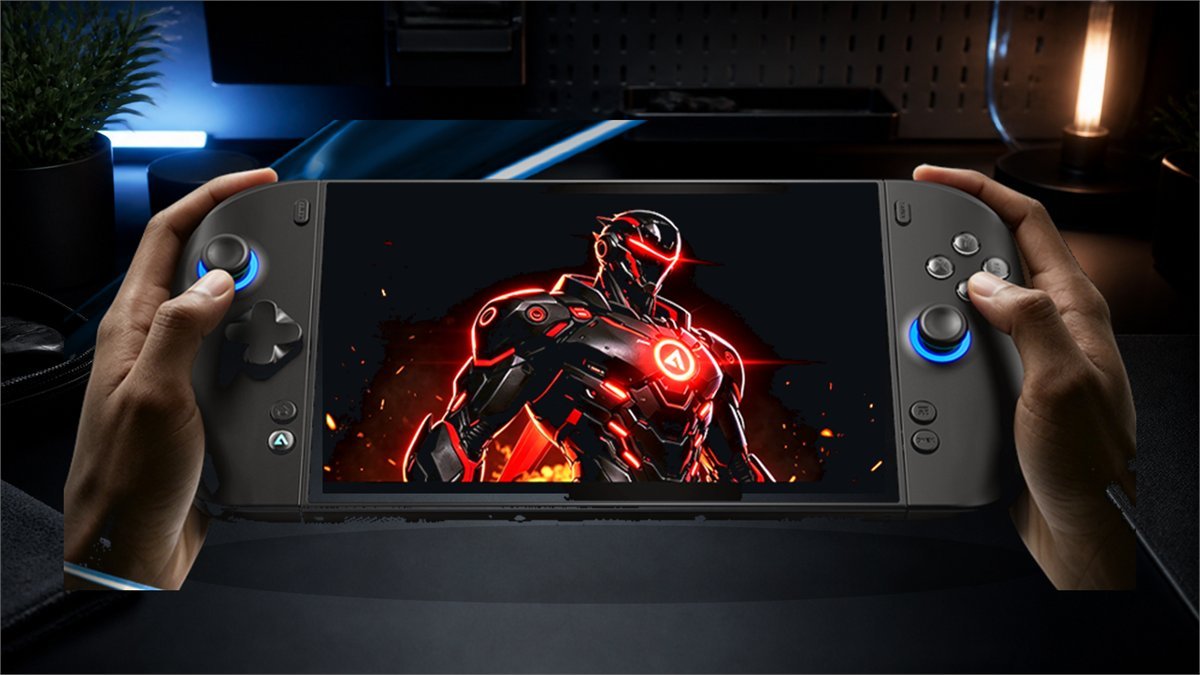
ONEXPLAYER X2 Mini Pro Setup Guide: TDP, SteamOS, Drivers & Best Settings
The ONEXPLAYER X2 Mini Pro combines an 8.8-inch 144 Hz OLED panel, detachable controls, an external 85 Wh battery and AMD’s Ryzen AI Max+ 388. That unusual design makes setup more important than it is on a conventional handheld: the best result comes from establishing a stable Windows baseline first, then tuning power, frame rate and resolution for each type of game.
Best starting configuration: keep the factory Windows installation, preserve the recovery partitions, install only the X2 Mini Pro system package and model-specific controller software, and begin demanding games at 30 W, 1920 x 1200, a 60 fps cap and FSR Quality. Move toward 35-45 W only when a game remains GPU-limited. Treat 50-55 W as a plugged-in performance range and the advertised 80 W air-cooled mode as a short, desk-bound option rather than an everyday default. SteamOS can be experimented with later, but it is not currently a fully supported X2 Mini Pro path.
What is different about the X2 Mini Pro?
The X2 Mini Pro is not simply a smaller Windows tablet with controllers attached. Its Ryzen AI Max+ 388 uses eight Zen 5 CPU cores and Radeon 8060S integrated graphics with 40 compute units. AMD lists a 45-120 W configurable TDP range for the processor family, but the handheld’s cooling mode, firmware and power controls determine what is practical inside this chassis.
ONEXPLAYER sells standard air-cooled and factory-configured liquid-cooled versions. The manufacturer states that the air-cooled version can sustain up to 80 W, while the liquid-cooled version can reach 120 W when paired with the Frost Bay dock. The liquid-cooling hardware has to be selected when the device is ordered; it is not a later clip-on upgrade for a standard unit.
| Component | Current specification | Setup consequence |
|---|---|---|
| CPU | AMD Ryzen AI Max+ 388, 8 cores / 16 threads, up to 5.0 GHz | CPU power is rarely the first setting to maximize. Most games benefit more from a stable GPU budget and sensible frame cap. |
| Integrated GPU | Radeon 8060S, 40 RDNA 3.5 compute units, up to 2900 MHz | The iGPU is substantially larger than a typical handheld APU, but higher TDP still produces diminishing returns and additional system draw. |
| Memory | 48 GB LPDDR5X-7464 or 64 GB LPDDR5X-8000, depending on configuration | Memory is shared by Windows and the GPU. Leave memory allocation on the stable factory setting until the device passes baseline tests. |
| Display | 1920 x 1200, 30-144 Hz VRR, native landscape OLED | Use 1200p first for clarity; fall back to 1280 x 800 before forcing an unnecessarily high wattage. |
| Storage | M.2 2280 PCIe 4.0 x4, external Mini SSD slot and microSD 4.0 | A second drive is safer for Linux testing than erasing the factory recovery layout. |
| Battery | Swappable external 85 Wh pack | The battery adds about 381 g and total system draw is always higher than the selected APU TDP. |
| Ports | USB-C 4.0, USB-C 3.2, USB-A 3.2, 3.5 mm audio and dedicated DC input | Test charging and data on every port before and after any SSD work or operating-system change. |
| Weight | About 799 g with controllers but without battery; liquid hardware adds about 70 g | The standard device and 381 g battery total roughly 1.18 kg, so desk and handheld ergonomics should be judged separately. |
The first-hour setup checklist
The first hour should establish whether the hardware works in its untouched factory state. Changing the SSD, BIOS, graphics package and operating system at once makes every later fault harder to isolate.
- Photograph the serial information and packaging. Keep the charger, cable, battery, controller bridge and accessories together until charging, display, controller and port tests are complete.
- Boot the factory Windows image offline first. Confirm that the OLED has no obvious panel damage, the touchscreen responds across the panel and the controllers attach securely.
- Create recovery media and a full backup. At minimum, preserve the factory recovery partitions before resizing a drive, installing Linux or replacing the internal SSD.
- Test both USB-C ports for power and data. Also test USB-A, audio, microSD, Wi-Fi, Bluetooth, fingerprint sign-in and the external battery. This gives you a before-and-after record if a later hardware change causes trouble.
- Calibrate and test every control. Check sticks, triggers, D-pad, shoulder buttons, rear or macro buttons, vibration and gyro in the attached and detached configurations.
- Record a stock benchmark. Use one repeatable game scene or benchmark at a known TDP, resolution and frame cap. Save temperatures, clocks, average fps and 1% lows.
Driver installation order that is easy to undo
ONEXPLAYER provides a dedicated X2 Mini Pro system package, general drivers, OneXConsole and Controller Software V503.2 identified specifically for the X2 Mini and X2 Mini Pro. The model-specific distinction matters: controller packages discussed for an older X2 or another ONEXPLAYER handheld should not be treated as interchangeable.
| Order | Action | Verification before continuing |
|---|---|---|
| 1. Recovery | Create a restore point and preserve the factory recovery image. | You can identify the recovery partitions and have a bootable recovery path. |
| 2. Windows | Install normal Windows updates, then restart twice. | Windows Update no longer has a pending restart and Device Manager has no newly appearing unknown device. |
| 3. OEM system pack | Use the official X2 Mini Pro system package and device drivers. | Chipset, audio, wireless, touch, sensors and power devices enumerate correctly. |
| 4. ONEXPLAYER tools | Install or update OneXConsole and the X2 Mini/X2 Mini Pro V503.2 controller package. | TDP control, fan controls and all buttons work after a cold boot, not only immediately after installation. |
| 5. Graphics | Keep the working OEM graphics package for the baseline. Try a newer AMD package only for a specific fix or feature. | The same benchmark remains stable and sleep, brightness, external display and video playback still work. |
If a newer AMD driver makes a game exit or introduces display trouble, roll back to the known-good package instead of stacking repeated clean-up tools and driver installers. Change one layer at a time and write down the version. The official support page also directs owners to support for handheld BIOS help; flashing an unrelated or unconfirmed BIOS is not a routine optimization.

Practical TDP profiles for the X2 Mini Pro
TDP is the processor package target, not the wattage drawn from the battery or wall. The OLED, memory, SSD, fans, controllers, charging losses and power-conversion circuitry all consume additional energy. Early owner comparisons also suggest that two handhelds at the same displayed TDP can have different total system draw, so a TDP label alone is not a battery-life or efficiency result.
| Starting profile | Good first use | Display and frame target | When to move higher |
|---|---|---|---|
| 15-18 W | Indie games, emulation within legal use, older PC titles and light 2D/3D games | 1200p or 800p; 40, 60 or 72 fps cap depending on frame-time stability | Only when GPU utilization stays near its limit and the frame-time graph shows a repeatable shortfall. |
| 25-30 W | Balanced portable profile for many modern games | 1200p medium settings, FSR Quality or Balanced, usually a 60 fps cap | Raise in 5 W steps after reducing ray tracing, heavy shadows and unnecessary ultra settings. |
| 35-45 W | Demanding AAA games and high-refresh titles while plugged in or accepting shorter battery time | 1200p with upscaling; 60, 72 or 90 fps according to the stable 1% low | Use 50-55 W only if the measured gain is meaningful in the actual game, not just in a benchmark average. |
| 50-55 W | Desk or dock profile for heavy games and productivity workloads | Prioritize stable frame times; fan noise and surface temperature become part of the decision | Move toward 80 W only for a short, controlled air-cooled test with adequate power and airflow. |
| 80 W air cooled | Manufacturer-rated maximum performance mode for the standard cooling design | Use on a hard surface with unobstructed vents and monitor temperature, clocks and noise | Do not treat it as the default merely because the control allows it. Stop if performance throttles or temperatures continue climbing. |
| 120 W liquid cooled | Only the factory liquid-cooling configuration with the compatible Frost Bay setup | Desktop use with the intended external cooling and power arrangement | This is not a setting for the standard air-cooled X2 Mini Pro. |
Several early owners describe the strongest efficiency region around 30-45 W, while some report little practical gaming gain above roughly 50-55 W compared with the increase in fan noise and total draw. These are early, game-dependent observations rather than universal limits. A CPU-heavy strategy title, a shader-heavy AAA game and an esports title can respond differently to the same 5 W increase.
Best display and game settings
The 1920 x 1200 OLED panel is one of the device’s strongest features, and its native landscape orientation avoids some of the rotation complications seen on older handheld panels. The useful goal is not always 144 fps. Matching a stable frame rate to the 30-144 Hz VRR window can look smoother than an unstable higher average.
A sensible order for tuning a demanding game
- Start at the native 1920 x 1200 resolution and a 60 fps cap.
- Turn off ray tracing first unless it is central to the game’s visual design.
- Use the medium preset, then restore texture quality if memory capacity allows.
- Enable FSR Quality. Move to Balanced only when the performance gain is needed.
- Reduce heavy shadow, volumetric, crowd-density and reflection settings one step at a time.
- Lower the output to 1280 x 800 if the game remains GPU-limited or the upscaled image is unstable.
- Raise TDP in 5 W steps only after the graphics settings and frame cap are sensible.
Use 1200p when
- Text and fine interface detail matter.
- The game reaches the frame cap without aggressive upscaling.
- You are playing slower RPG, strategy or adventure titles.
- The device is plugged in and the extra GPU load is acceptable.
Use 800p when
- A demanding game cannot hold the desired minimum frame rate.
- Battery efficiency matters more than pixel-level sharpness.
- FSR Performance at 1200p looks less stable than a cleaner 800p output.
- The official support guidance recommends it while troubleshooting low fps.
Frame generation is most convincing when the game already has a responsive base frame rate. It can make a counter read higher, but it cannot repair poor input latency or severe CPU stutter. As a practical rule, establish roughly 45-60 real frames per second before using frame generation, then inspect interface elements, camera pans and fine geometry for artifacts.
OLED, VRR and HDR settings
Use the Windows HDR Calibration app if HDR is important, and compare the result in a known HDR title rather than forcing HDR globally. The panel is specified for up to 700 nits in high-brightness mode and a 1100-nit HDR peak, but small-window peak brightness is not the same as sustained full-screen brightness. For desktop use, auto-hide the taskbar, use a short display-off timer and avoid leaving static launchers at maximum brightness for long periods.
For variable refresh, choose a cap the game can hold through busy scenes. A stable 60 or 72 fps profile usually feels better than a 90 fps cap that repeatedly falls outside its intended range. Competitive games can justify 90, 120 or 144 fps, but only after the 1% lows and input response are stable.
SteamOS on the X2 Mini Pro: what works and what is still experimental
Valve allows SteamOS installation on additional AMD handhelds, but support outside the officially validated hardware remains limited and experimental. The X2 Mini Pro is not currently listed as a fully supported SteamOS device. A successful boot therefore does not prove that brightness control, sleep, controller mapping, RGB, audio, TDP limits and firmware tools all work correctly.
Early X2 Mini Pro reports describe SteamOS booting, but also mention a non-working brightness slider, incomplete controller or RGB behavior and TDP control that did not expose the Windows range. One owner also reported overwriting the factory recovery layout and having to reinstall Windows. These are exactly the kinds of device-specific gaps that a generic SteamOS installation guide cannot remove.
| Option | Advantages | Current X2 Mini Pro risks |
|---|---|---|
| Factory Windows 11 | OneXConsole, official driver path, full power range and the most direct support route | More background services, Windows update interruptions and additional handheld UI setup |
| SteamOS experiment | Console-like Steam interface, Gamescope and a familiar suspend-oriented workflow | X2 Mini Pro is not fully supported; brightness, controls, RGB, TDP and recovery may require workarounds |
| Bazzite handheld image | Steam Gaming Mode plus a broader community handheld stack | The published ONEXPLAYER support notes do not specifically validate the X2 Mini Pro; manual fixes and incomplete features remain possible |
Safer Linux test procedure
- Update and test Windows first, then create recovery media and a full drive image.
- Record the BitLocker recovery key if device encryption is active.
- Use a separate SSD when possible. Do not assume that a small recovery partition is disposable.
- Test the live or installer environment for display orientation, Wi-Fi, sound and controller input before writing the disk.
- After installation, test sleep and resume ten times, brightness, both USB-C ports, attached and detached controls, charging, external display and every TDP step.
- Use only one TDP-control method. Bazzite’s documentation warns that overlapping TDP tools can conflict.
Storage upgrades without losing the recovery path
The internal M.2 2280 slot makes capacity upgrades practical, but the first job is cloning or imaging the original drive. Owners who open the device should also test charging and data on both USB-C ports immediately before and after reassembly. A reported case of split charging and data behavior after an SSD replacement is not proof of a widespread defect, but it is a useful reason to document the ports and avoid forcing connectors or internal cables.
- Shut down fully, disconnect external power and remove the external battery before opening the device.
- Use ESD precautions and the correct driver size; do not lever against a ribbon cable or port assembly.
- Clone the original drive or prepare the official system image before replacing it.
- Choose an SSD with sensible thermal behavior; peak benchmark speed is less useful if the drive throttles beside the cooling system.
- After reassembly, test sleep, charging, USB data, Wi-Fi, controllers, fans and a sustained storage transfer before deleting the old drive.
External battery, total draw and realistic portability
The 85 Wh battery is external and swappable, which lets the tablet portion stay relatively thin and allows battery replacement without opening the main chassis. The trade-off is mass: the published weights put the standard device with controllers at about 799 g without the battery and the battery at about 381 g. Together they are approximately 1.18 kg before a case, charger or controller bridge is added.
Battery estimates should be based on measured total discharge, not TDP. A 30 W APU setting may produce a much higher whole-system draw once the display, memory, SSD, fans and conversion losses are included. Use HWiNFO or a reliable power meter, run the same game for 15 minutes after temperatures stabilize, and estimate runtime from the observed battery percentage change. This method also reveals whether lowering brightness or capping the frame rate saves more power than reducing TDP alone.
What early owners consistently like and question
Early owner reports are positive about the OLED’s contrast and motion, the amount of graphics performance available above the usual handheld power range, and the flexibility of detachable controllers plus a removable battery. Several users describe good results in demanding games around 35-45 W, suggesting that the X2 Mini Pro does not need its maximum mode to feel fast.
The recurring cautions are equally practical. Controller shape, trigger and D-pad feel receive mixed comments; calibration helped at least one owner but cannot change every ergonomic preference. Fan noise becomes more noticeable at high wattage. The external battery solves serviceability and capacity in an unusual way, but makes the complete handheld heavy. Linux support is early, and isolated charger or USB-C reports deserve prompt testing rather than broad assumptions.
The most useful buying question is therefore not whether the X2 Mini Pro is the fastest handheld in one benchmark. It is whether you want an 8.8-inch OLED Windows machine that can operate across tablet, handheld and desk modes, and whether you are comfortable trading price, weight and software maturity for that flexibility.
For current availability, tracked prices and brand-specific savings, compare the latest ONEXPLAYER coupons, handheld deals and price offers.
A stable everyday configuration
For most owners, the strongest everyday profile is less dramatic than the maximum specification: Windows 11 with the official X2 Mini Pro system package, a known-good graphics driver, OneXConsole, the V503.2 controller package, 1920 x 1200 at 60 or 72 fps, FSR Quality and a 30 W starting TDP. Demanding games can move to 35-45 W, while lighter titles should move downward until frame times stop improving.
Keep a separate 50-55 W plugged-in profile for games that demonstrably benefit. Reserve 80 W for short air-cooled tests and 120 W for the factory liquid-cooled configuration with its intended hardware. SteamOS is better treated as a backed-up secondary-drive experiment than as the first action on a new device. That sequence preserves recovery, keeps troubleshooting understandable and makes the X2 Mini Pro’s unusual hardware easier to enjoy rather than harder to diagnose.
ONEXPLAYER X2 Mini Pro setup questions
What TDP should I use on the ONEXPLAYER X2 Mini Pro?
Start at 15-18 W for light games, 25-30 W for a balanced portable profile and 35-45 W for demanding games. Use 50-55 W only when a repeatable A/B test shows a useful gain. The advertised 80 W air-cooled mode is not the best everyday default, and 120 W requires the factory liquid-cooling configuration.
Should I install the newest AMD graphics driver immediately?
Not before creating a stable baseline. Test the factory or OEM package first, record a repeatable benchmark and change to a newer AMD package only for a needed game fix or feature. Keep the known-good installer or recovery route available for rollback.
Does SteamOS fully support the X2 Mini Pro?
No. SteamOS can boot on additional AMD handhelds, but the X2 Mini Pro is not currently a fully supported target. Early reports mention brightness, controller, RGB and TDP limitations. Preserve Windows recovery and test Linux on a separate drive when possible.
Is 120 W available on every X2 Mini Pro?
No. ONEXPLAYER associates 120 W with the factory liquid-cooled version and its Frost Bay arrangement. The liquid-cooling hardware cannot simply be added later to a standard air-cooled unit.
Is 1200p or 800p better for games?
Use 1200p first for sharp text and interface detail. Move to 800p when a demanding game cannot hold the desired minimum frame rate or when battery efficiency matters more than maximum sharpness. Adjust ray tracing and heavy quality settings before using an extreme TDP.
Why is battery draw higher than the selected TDP?
TDP describes the processor package target, not the entire machine. The OLED, memory, SSD, fans, controllers and power conversion all add to total draw. Measure the actual battery discharge rate for the game and brightness level you use.
Technical references and owner discussions
- AMD Ryzen AI Max+ 388 specifications
- ONEXPLAYER drivers and support downloads
- Valve SteamOS installation and compatibility guidance
- Bazzite handheld compatibility guidance
- Early X2 Mini Pro owner impressions and controller discussion
- Owner setup and TDP observations
- X2 Mini Pro SteamOS and Bazzite reports
- USB-C troubleshooting after an SSD change
- Owner performance and high-TDP observations
- Display, controller and battery owner impressions