Cycplus M1 GPS Bike Computer Reviews & Ultimate Connection Guide
The Complete 2026 Handbook: Performance Analysis & Professional Setup
Finding a balance between affordability and high-end metrics used to be a challenge for cyclists. However, current cycplus m1 gps bike computer reviews highlight a shift in the industry. The Cycplus M1 has become a staple for riders who want the precision of a Swiss U-BLOX GPS chip without the premium price tag of legacy brands. Whether you are a weekend warrior or a dedicated training enthusiast, understanding how to maximize this device is key to your performance tracking.

CYCPLUS Bike Computer M1 + Front Mount Z1 + C3 Bike Speed & Cadence Sensor
Official Cycplus M1 Quick Start Manual
Extracted from the Official 2026 Documentation
1. Device & Screen Overview
The Cycplus M1 features a 2.9 inch LCD screen and boasts an impressive 35-60 hours of battery life. Below is the official screen layout:
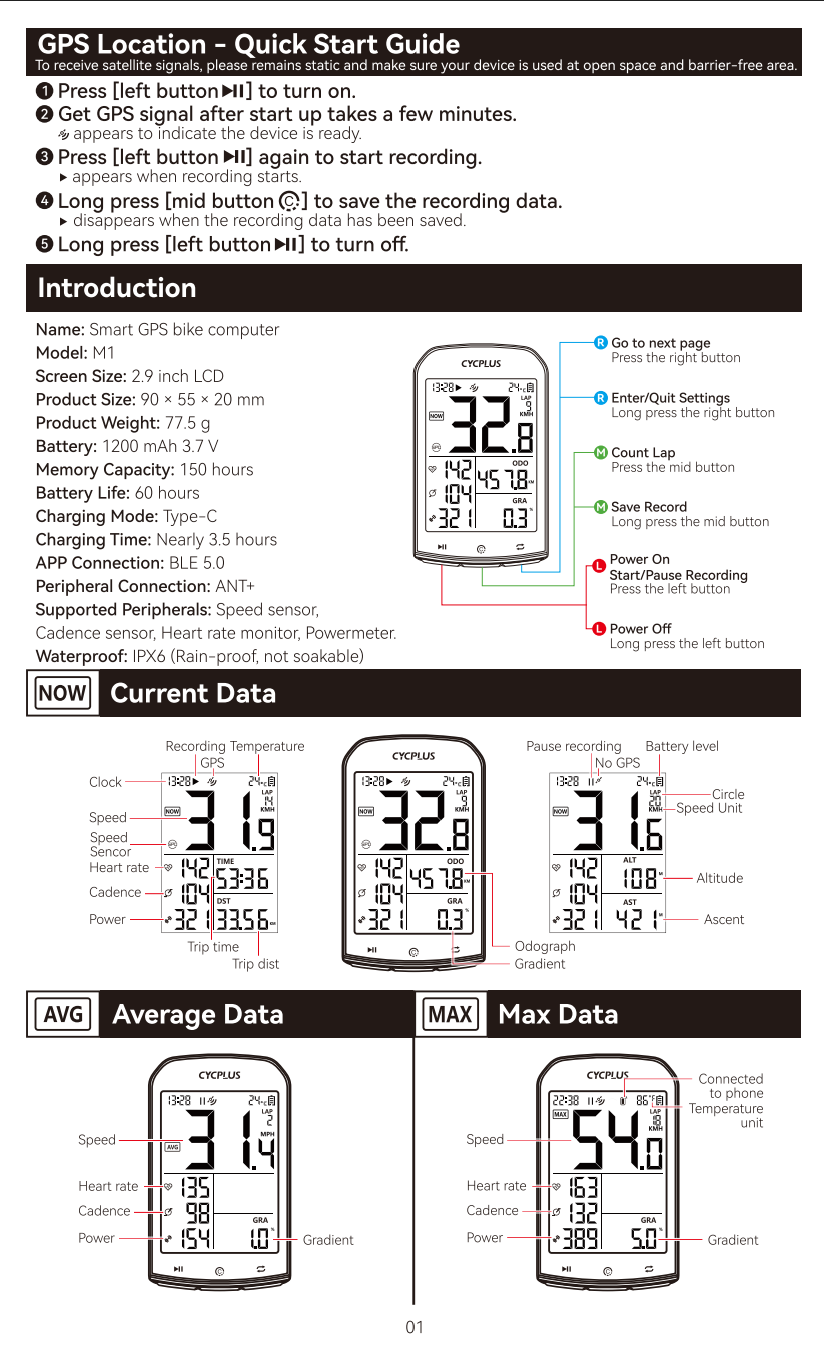
Image: Display interface showing Speed, Heart Rate, Cadence, Power, and Gradient.
Button Functions
- Left Button: Short press to Start/Pause recording. Long press to turn Power On/Off.
- Mid Button: Short press to Count Lap. Long press to Save Record.
- Right Button: Short press to go to the next page. Long press to Enter/Quit Settings.
Quick Start Steps
- Press the left button to turn the device on.
- Remain static in an open space to receive satellite signals.
- The GPS icon appears when ready.
- Press the left button again to start recording.
- Long press the mid button to save the recording data.
2. Settings Menu Configuration (C2 – C9)
Long press the right button to enter the settings mode. Use the right button to cycle through the pages:
| Page | Setting Function | Action |
|---|---|---|
| C2 | ANT+ Sensor Pairing | Press the left button to search for sensors. |
| C3 | Wheel Circumference | Press the right button to modify the digit and mid button to switch. |
| C4 | Time Zone | Press the right button to modify the time zone. |
| C5 | Speed Unit | Press the right button to switch between KMH and MPH. |
| C6 | Temperature Unit | Press the right button to switch between °C and °F. |
| C7 | Factory Reset | Long press the mid button to restore factory settings. |
| C8 | Odograph Setting | Press the right button to modify your initial distance digits. |
| C9 | Unpair Sensors | Press the left button to unpair all the paired sensors. |
After setting your local time zone, the device’s backlight will be automatically lighted every night from 18:00 to 09:00. To view advanced data, search for the “CYCPLUS Fit” app on Google Play or the App Store.
3. Mount Installation
The M1 uses a standard quarter-turn mount. Use the included rubber pad and cross-fix the mount to your handlebars or stem using the provided rubber bands.
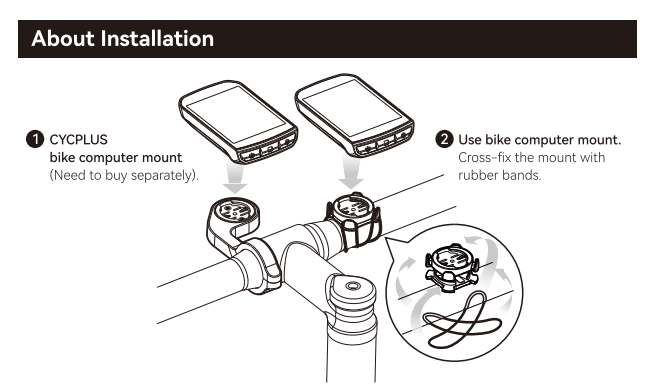
Image: Cross-fixing the mount with rubber bands.
Hardware Performance & GPS Precision
At the heart of the M1 is the Swiss U-BLOX navigation chip. This is a critical component often mentioned in cycplus m1 gps bike computer reviews because it allows the device to connect to four different satellite systems: GPS, GLONASS, Galileo, and BeiDou. This multi-system approach ensures that even if you are riding through dense forests or urban canyons, your tracking remains stable.
Battery Resilience: During our tests in 2026, the M1 consistently delivered 30-35 hours of active recording with backlight usage. This makes it an ideal companion for multi-day bike packing trips where charging ports are scarce.
Final Verdict
- Unrivaled display size (2.9″) for the price
- Rock-solid ANT+ sensor stability
- Automatic backlight based on time zone
- No built-in map navigation (Breadcrumb only)
- The companion app can be slow during peak hours
The Cycplus M1 isn’t just a budget computer; it’s a statement that high-quality cycling data should be accessible to everyone. If you need navigation for unknown trails, you might need to look at higher-end Garmin units. But for performance tracking, intervals, and reliable Strava syncing, the Cycplus M1 is a powerhouse that won’t let you down.