BIQU Panda Vision Encoder H2D Calibration: Setup, Accuracy Tests, and Whether It Is Worth It
The BIQU Panda Vision Encoder is not a new build plate and it is not a general print-quality upgrade. It is a camera-readable reference grid that lets a Bambu Lab H2-series printer map XY positioning error and apply a correction during future motion. That can matter for long dimensions, diagonals, repeated hole patterns and parts that must assemble. It may do almost nothing visible for a printer that is already accurate or for models where material shrinkage is the larger error.
Short verdict: this is a specialized calibration tool, not an automatic route to smoother figurines. It is most defensible for H2D owners who make fixtures, enclosures, press-fit parts or large assemblies, or who have moved the printer, adjusted belts or accumulated substantial print hours. The BIQU version is new and direct owner evidence is still limited, so recognition and repeatability should be tested immediately.
What the BIQU Panda Vision Encoder actually calibrates
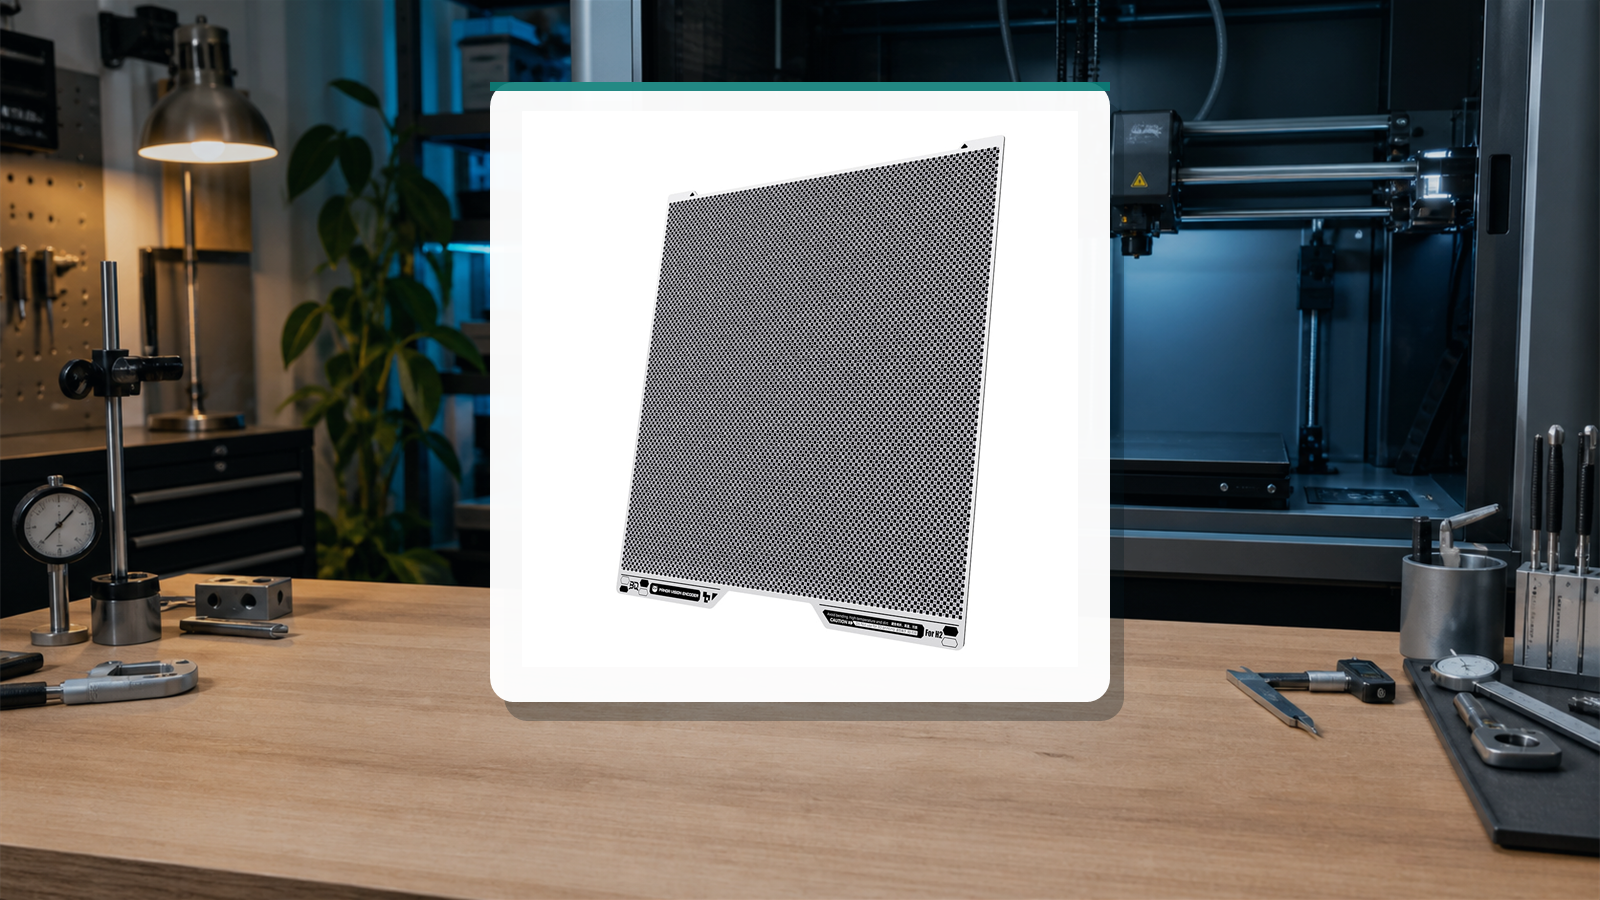
The plate carries a dense field of uniquely identifiable markers. During Motion Accuracy Calibration, the H2D toolhead camera moves over that pattern and compares where the machine believes the toolhead is with the marker position it actually sees. The printer then stores compensation for motion-system error across the XY workspace.
BIQU advertises a matrix of 10,000 markers, 5-micrometer optical measurement resolution and corrected XY motion accuracy below 50 micrometers. Those numbers describe the brand’s claimed measurement and calibration capability; they are not the same as a guarantee that every printed dimension will land within 0.05 mm. A printed part also includes nozzle width, extrusion, cooling, polymer shrinkage, warping, slicer compensation and measuring error.
It can address
- XY scale error over long travel
- Axis squareness and skew
- Position-dependent motion deviation
- Some effects of belt settling or mechanical wear
- Repeatability of features placed far apart
It cannot address
- Filament shrinkage or warping
- Flow ratio and pressure advance
- Z-banding or bed flatness
- Wrong hole/contour compensation
- Loose parts, damaged bearings or a mechanical fault
BIQU Panda Vision Encoder specifications and the practical meaning
| Specification or claim | Published value | What it means in practice |
|---|---|---|
| Printer compatibility | Bambu Lab H2D, H2S and H2C | The plate is aimed at the H2 motion-calibration workflow. BIQU makes this compatibility claim; Bambu’s own failure guide asks users to verify an official encoder when diagnosing errors. |
| Marker field | 10,000 encoded markers | A dense absolute reference lets the camera sample error at many positions instead of inferring the entire bed from one short movement. |
| Optical resolution | 5 micrometers | This is a measurement-system claim, not printed-part tolerance. FDM material and process variation remain much larger. |
| Corrected motion accuracy | Under 50 micrometers | The target concerns XY toolhead motion. Printed holes, walls and assemblies still need material and slicer calibration. |
| Calibration time | Approximately five minutes | The guided scan is short enough to repeat after service or relocation, but preparation and before/after prints take longer. |

BIQU Panda Vision Encoder H2D calibration setup
The official H2D workflow can be started from the printer’s Calibration menu. Some calibration tasks are also available through Bambu Handy or Bambu Studio, but the touchscreen is the most direct route when Motion Accuracy Calibration does not appear elsewhere.
- Let the heatbed and chamber return to room temperature. Bambu warns that placing the encoder on a hot bed can make it expand or deform and create calibration error. Do not run the procedure immediately after ABS, ASA, PC or another heated-chamber job.
- Remove every protective layer. Owners repeatedly report missing the very thin transparent film bonded to the patterned surface. Remove packaging and the attached protective film without scratching the marker field.
- Inspect and clean the reference. Under bright indirect light, look for bent corners, deep scratches, fingerprints and debris. Use a clean, lint-free method suitable for an optical surface and allow it to dry completely.
- Clean the toolhead camera lens. A smudge on the camera can make a good plate unreadable. Use lens tissue rather than a dusty shop rag, and check the printer for toolhead-camera HMS errors.
- Seat the plate against the rear locators. The encoder may be narrower than a normal build plate, but the rear locating tabs still establish its position. It must sit flat and must not ride on a purge line, stray filament or debris.
- Keep lighting controlled. Follow the on-screen sequence and avoid adding a strong work light through the open door. Bambu’s troubleshooting material lists overexposure from chamber or external lighting as a failure cause.
- Run Motion Accuracy Calibration once. On the touchscreen, open Calibration, choose the motion-accuracy routine and follow the prompts. Do not touch the printer, plate or workbench during the scan.
- Confirm that enhancement is enabled. On the printer, open Settings, then Print Options, and verify Motion Accuracy Enhancement. Calibration data cannot improve a job when the enhancement is disabled.
- Remove and store the plate. Return it to a rigid, dry sleeve or flat case away from heated beds, sunlight and stacked tools. It is a reusable reference, not a permanent machine component.
What the calibration result screen is telling you
The result diagram is easy to overread. The displaced circles show the pre-correction relationship to the target grid, and the visual offset is magnified so the direction can be seen. It is not a scale drawing of how crooked the printer was. Older firmware sometimes reported average and maximum correction in micrometers; newer screens may emphasize the grid instead.
Running the routine repeatedly is not a progressive polishing process. Community explanations consistently note that a new run discards the previous compensation and measures from the uncorrected reference again. Similar-looking diagrams on consecutive runs can therefore be normal. The useful question is whether a controlled printed coupon becomes more accurate and repeatable.
How to test H2D accuracy before and after calibration
A 20 mm cube is too short and too sensitive to wall thickness for a convincing motion test. One tenth of a millimeter on a 20 mm feature equals 0.5 percent, while the same absolute measurement error on a 150 mm feature is far easier to separate from caliper technique. A useful test should also include both diagonals, inside and outside dimensions, and features at different bed positions.
| Test feature | Suggested geometry | What it diagnoses | How to read it |
|---|---|---|---|
| Long X and Y span | 120-150 mm outside dimensions | Axis scale and distance-dependent error | Compare signed error in X and Y, not only the average of both. |
| Diagonal pair | Large rectangle with measurable corner references | Squareness and skew | Equal diagonals indicate a square rectangle; unequal diagonals expose skew even when X and Y lengths look correct. |
| Inside and outside pair | Frame with an external wall and internal opening | Separates motion scale from extrusion influence | If both shift in the same direction, scale/shrink is likely; opposite errors point toward wall or contour compensation. |
| Hole-spacing row | Several holes with known center spacing | Feature placement across distance | Measure center-to-center where possible. Hole diameter alone is dominated by extrusion and slicer compensation. |
| Five-position repeat | Same coupon at center and four bed regions | Position-dependent consistency | Compare the range across positions, not just the best sample. |
| Assembly coupon | Pin, slot and sliding-fit pair | Practical fit after calibration | Use the same clearance and material before and after; do not redesign between runs. |
A reproducible A/B sequence
- Update only if necessary, then record printer firmware, Bambu Studio version, nozzle, build plate, filament profile and Motion Accuracy Enhancement state.
- Dry or condition one spool and use it for every sample. Keep room and chamber conditions as stable as practical.
- With Motion Accuracy Enhancement disabled, print at least three identical coupons in the same orientation. Let all parts cool before measurement.
- Measure every defined feature three times with the same tool and jaw pressure. Record signed error: measured value minus nominal value.
- Run the BIQU Panda Vision Encoder calibration, enable Motion Accuracy Enhancement and change nothing else.
- Print the same number of coupons from the same file and measure them in the same order.
- Compare median error and the range between repeats. An improvement that is smaller than measurement scatter is not a proven improvement.
Accuracy evidence: why owner results look contradictory
H2-series reports split into two believable groups. Owners making large functional assemblies, interference fits and repeated hole patterns sometimes report a clear practical improvement, especially after the machine has accumulated hundreds of hours or produced parts that would not assemble. Other owners measure little change on a new or already accurate printer, and several say the before/after surface appearance is indistinguishable.
That is not necessarily a contradiction. A motion correction can improve the center position of a hole or reduce diagonal skew without changing layer lines, color, gloss or fine surface texture. Conversely, a visibly rough wall may come from resonance, a loose hotend, extrusion, cooling or Z-axis behavior that the encoder cannot correct.
One public H2D result reported a 130-micrometer average correction and a 302-micrometer maximum correction, but the discussion correctly asked for measured prints rather than trusting the calibration summary alone. Another owner described a large multi-part project whose tolerances became usable after calibration at roughly 600 print hours. A more controlled community report based on about 20 prints found a mixed outcome: small changes in X and Y, worse diagonal geometry, and both states still inside normal FDM tolerance. An independent long-term H2D review likewise found no significant benefit because the printer was already within about 0.10 mm.
The useful conclusion is narrower than either “magic” or “gimmick.” The encoder can compensate a real XY motion map, but the size of the benefit depends on how far the individual machine has drifted and whether the printed job is sensitive to that specific error.
When the Panda Vision Encoder is likely worth it
Strongest reason to use it
- Large assemblies and widely spaced hole patterns
- Repeated production fixtures and measurement jigs
- Press-fit or sliding-fit parts with defined clearances
- An H2 machine that has been moved, serviced or adjusted
- A documented drift in X/Y scale or diagonal equality
Weakest reason to use it
- Decorative models with no measured fit requirement
- A new machine already meeting the required tolerance
- Z-banding, rough walls or first-layer problems
- Parts dominated by warping or material shrinkage
- Expectation of a dramatic surface-quality change
High-value case: a part uses widely separated holes, long rails, mating panels or multiple printed sections that must register over 200-300 mm. A small angular or scale error can become a failed assembly even when each local wall looks clean.
Moderate-value case: the H2D has been relocated, suffered a collision, had belt tension changed or undergone motion-system service. The official manual specifically identifies these events as reasons to recalibrate.
Low-value case: the printer makes miniatures, toys and decorative models that already look good and do not have measured fit requirements. Flow tuning, filament drying, resonance control and layer-height choices will usually have a larger visible effect.
The most economical option for an occasional user may be sharing one protected plate with another local H2 owner, provided the plate stays flat and undamaged.
Why calibration can make no difference or appear worse
| Symptom | Likely explanation | Next check |
|---|---|---|
| No visible change | The printer was already accurate, or the model is not sensitive to XY geometry. | Measure a long coupon and diagonals instead of comparing surface photos. |
| X/Y improve but holes do not | Hole diameter is still affected by extrusion and XY hole compensation. | Measure hole center spacing, then tune hole compensation separately. |
| Long dimensions are still undersized | Material shrinkage may dominate after motion correction. | Compare X and Y percentage error with a large inside/outside coupon after cooling. |
| Diagonal error becomes worse | Plate seating, marker condition, camera reading or test scatter may be involved. | Check placement and cleanliness, repeat the physical coupon, then inspect belts and frame before trusting another calibration. |
| First layer still fails | Motion calibration does not level the bed or set first-layer adhesion. | Run the relevant bed/nozzle calibration and inspect the actual build surface. |
| Z-banding remains | The encoder maps XY position, not Z lead-screw behavior, extrusion pulsation or hotend looseness. | Inspect the mechanical and extrusion path associated with the banding frequency. |
Panda Vision Encoder not recognized: practical troubleshooting
- Stop and check for the bonded transparent film. This is the most frequently repeated owner mistake and can be hard to see.
- Cool the machine. Remove the plate if the bed is warm and allow both to reach a stable room temperature.
- Clean both optical surfaces. Inspect the encoded pattern and the toolhead camera lens for oil, dust and streaks.
- Reseat the plate. Place it flat against the rear locators and clear every fragment of filament from beneath it.
- Remove uncontrolled lighting. Follow the printer’s automated light sequence; bright external lamps can overexpose the camera.
- Inspect the marker field. A deep scratch, bend or deformation can destroy the reference the camera expects.
- Restart and check firmware/HMS status. If the toolhead camera cannot initialize, solve that fault before repeating calibration.
- Use the return and support path early. Because the BIQU plate is a new third-party option and Bambu’s troubleshooting guide names the official encoder, persistent recognition failure should be documented with photos and error codes rather than bypassed.
How often should an H2D be recalibrated?
Bambu’s H2D manual recommends motion-accuracy calibration when the feature is first enabled, after a severe collision, relocation, disassembly/reassembly or belt-tension adjustment. It also gives a routine interval of once every two weeks. At the same time, the manual says calibration data can remain stable for weeks and is unaffected by filament or nozzle changes.
That means a nozzle swap or a different spool does not automatically require this plate. A sensible production workflow is to keep a known dimensional control part and recalibrate when its X/Y geometry moves outside the tolerance that matters to the job, while still respecting the manufacturer’s maintenance schedule. Recalibrating blindly before every print adds handling risk without proving additional accuracy.
Before ordering, compare current availability, tracked pricing and any brand offers on the BIQU 3D printer accessories deals and coupons page.
Check BIQU DealsFinal assessment
The BIQU Panda Vision Encoder targets a real problem: XY motion error is difficult to map manually across a large H2D bed, and small scale or skew differences can ruin an assembly without making the print look obviously bad. The guided camera scan is far more convenient than creating and maintaining a manual compensation workflow.
Its limits matter just as much. BIQU’s under-50-micrometer figure is a motion claim, not a promise for the final polymer part. The current BIQU product is also too new for a mature body of direct owner reviews. H2-series evidence suggests the best results appear in measured fit and long-distance consistency, while already accurate machines may show little benefit and decorative prints may look identical.
Buy it for a dimensional requirement, not for a prettier Benchy. Establish an uncalibrated baseline, run the plate once on a cool and clean machine, enable Motion Accuracy Enhancement and repeat the same coupon. If median X/Y and diagonal error improve beyond the measurement scatter, the tool has answered the value question for that printer. If they do not, the money is better directed toward the actual source of error.
BIQU Panda Vision Encoder H2D questions
How do I calibrate an H2D with the BIQU Panda Vision Encoder?
Cool the bed, remove the thin protective film, clean the encoder and toolhead camera, place the plate flat against the rear locators, then start Motion Accuracy Calibration from the printer’s Calibration menu. When it finishes, verify that Motion Accuracy Enhancement is enabled under Settings and Print Options.
Does the Vision Encoder improve H2D print quality?
It can improve XY dimensional placement, skew and assembly consistency. It does not directly fix layer lines, Z-banding, extrusion, first-layer adhesion or material shrinkage, so decorative surface quality may look unchanged.
Is the BIQU Panda Vision Encoder compatible with H2S and H2C?
BIQU lists H2D, H2S and H2C compatibility. Because it is a new third-party plate and direct owner evidence remains limited, test recognition and a measured before/after coupon promptly.
Why does the calibration result look the same when I run it twice?
Each run starts by measuring from an uncorrected reference, and the display magnifies deviation for visibility. Similar diagrams do not mean the compensation was applied twice or failed; verify the result with controlled prints.
Does motion calibration correct filament shrinkage?
No. It corrects XY motion coordinates. Material shrinkage, warping, flow and hole/contour compensation must be tested separately after the machine geometry is stable.
When should I rerun H2D Motion Accuracy Calibration?
Run it after a significant collision, moving the printer, motion-system disassembly or reassembly, and belt-tension changes. The H2D manual also recommends a two-week routine interval, while noting that stored results can remain useful for weeks.
Technical references and owner evidence
- Bambu Lab H2D user manual: motion accuracy calibration and failure guidance
- Independent H2D Vision Encoder before-and-after test setup
- Independent H2D long-term review and dimensional assessment
- Bambu community discussion of calibration results and belt adjustment
- Bambu community discussion of motion accuracy versus material shrinkage
- Large multi-part assembly report after H2-series calibration
- Owner discussion including a mixed multi-print accuracy test
- Calibration diagram and repeated-run interpretation
- Vision Encoder recognition troubleshooting report